

How To Repair Camper Walls
Hey! This site is reader-supported and we earn commissions if you purchase products from retailers afterwards clicking on a link from our site.
What if you have some sort of impairment to one of your RV's walls due to weather issues such as water, hail, or snow; are you prepared to tackle the repair of that damage past yourself? Would you similar to remodel or upgrade your interior design past replacing an interior or relocating an inner wall and you lot're non sure how to do that task?
If you answered yes to those questions, be sure to read on. In this commodity, I'll guide you through how to repair damaged walls and how to redesign or remodel an existing wall if yous've recently purchased a used RV and you lot want to upgrade its design. We'll likewise look at what tools, hardware, and materials you'll likely need to practise the upgrades and the needed repairs.
First, find out where the leak is
The about important aspect when addressing water damage in your RV is to observe out where your leak is and what's the best solution for making the necessary repairs. Quite ofttimes, the source of the leak may be in a place several feet away from the damaged expanse in the wall, so you'll need to thoroughly inspect your RV prior to making your repairs.
While the general rule for complimentary-flowing water is to take the path of to the lowest degree resistance, if a seam on your roof just allows a minuscule corporeality of moisture into its opening, then it'due south likely that path could change betwixt times of leakage and the path could also change based upon how level your RV is parked or whether you lot're diving in the rain.
As a rule, you'll find that nearly water damage in a wall is the upshot of a leak in your roof. This is likely to cause water stains on your ceiling and staining high on your wall or at its base of operations. Nonetheless, it'south also possible to have leakage through your floor and the water staining will be concentrated at the base of operations of your walls. With that said, I would recommend that y'all beginning inspect your flooring by getting under your RV and search for any deterioration nearest to where you suspect that water is getting into your rig.
If you discover that in that location that there are no leaks in your floor, the side by side step is to audit your roof. For this task, you lot'll need to properly access your roof and I recommend that you lot avoid using a manufacturer installed ladder at the rear of your rig. Why? Because at that place could he structural harm to the roof that won't hold your weight.
Instead, a better pick would be to use an adjustable and foldable ladder that can be easily stowed abroad with whatever other essential tools you'll likely need when traveling. Whether you're a full-time RVer or a role-timer, I recommend that you always comport a ladder to admission the roof expanse of your RV when needed.
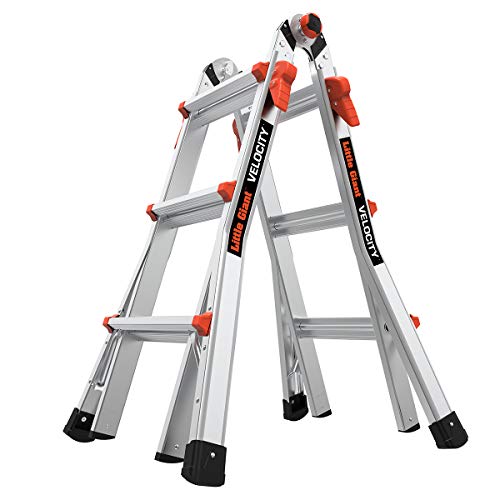
Piddling Giant Ladders, Velocity, M13, 13 Ft,...
- Dimensions - Max A-frame height: 5'i'' | Max Extension Acme: 11' | Max scaffolding acme: 3' |...
- The Velocity too includes several innovative new features such as the dual-pin hinge and the...
- The Velocity can be used in many unique configurations as an a-frame, extension, staircase and...
Last update on 2022-02-15 / Affiliate links / Images from Amazon Product Advertising API
Inspecting your RV roof tin exist catchy. Depending upon the manufacturers and their various pattern guidelines, there may will be a wall and sealing seams which is usually covered upward with a J-runway. This, and cantankerous seams that seal the interior areas of your roof are likely to cause issues with your RV'due south roof. The pull a fast one on is identifying those breeches and properly repairing them. In a future article, I'll share my tips on the all-time ways to seal your roof to foreclose any water leaks.
Once you have located the source of the leak and take properly sealed it, now you'll need to tear into your wall to make the necessary repairs. To brainstorm, locate the nearest wall panel seam to your damaged area. If there are floor or ceiling moldings, you'll need to remove these before you lot begin to remove whatsoever paneling. You lot'll too need to remove whatever electrical outlet and switch covers besides.
Removing your wall panels
As I accept said in numerous other manufactures, RV manufacturers typically don't apply the almost expensive materials when edifice RVs. And they're also built with time efficiency in mind. Don't be surprised if yous discover that your wall panels have been fastened to the studwork with edifice staples. If this is the case, you should accept a pair of pliers, a hammer, and a flat-head screwdriver on paw considering you'll need to pry the screwdriver under the staple by lightly tapping on the screwdriver handle (a modest wood chisel works well for this too) and so pull up on the chisel or screwdriver and this should one or both sides of the staple gratuitous of the studwork. If only one side of the staple is freed, then use your pliers to completely remove the staple. Repeat this process for each stud until the panel tin be removed. If your damage is located in the front upper console (and sometimes a rear panel) it's probable that you lot'll run into a radius so endeavour to save this part of the old panel to use as a template when cutting your new replacement panel. In fact, do your best to preserve the old panel then you lot'll know where whatsoever openings for windows, or outlets are located too.
If your console has been fastened using finishing nails, information technology's likely that as you pry the panel away from the studwork, that the panel volition pull away simply non the blast since finishing nails don't take a large head on them similar virtually other nails have. If this is the example, after you accept removed the panel, you lot'll need to use the claw side of your hammer to pull the nails free.
Some other option for removing nails is to use a wrecking pry bar. These are inexpensive and a great selection when removing modest nails.
Sale
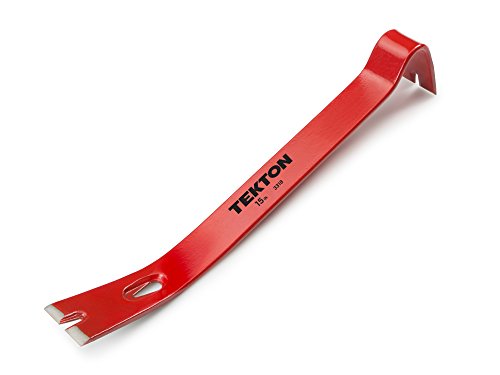
TEKTON 15 Inch Flat Pry Bar | 3318
- Versatile, all-purpose contoured bar with wide flat stop and high-leverage rocker end
- Sparse, sharpened chisel tips slide hands into the tightest cracks and crevices
- Three nail slots (one at each finish, 1 in the eye) lets y'all get at nails from any angle
Last update on 2022-02-xv / Affiliate links / Images from Amazon Production Advertizing API
Earlier you begin to supervene upon your damaged panels, be sure to audit any insulation in your wall for damage too. When yous're replacing an entire panel, it's probable that not all the panel will have water harm nor will the insulation or whatsoever other components such as wiring. Still, I'k a firm believer that once y'all accept taken something autonomously, you lot should inspect annihilation you can and make the appropriate changes or upgrades when you can.
For example, this is a great fourth dimension to modernize your rig if information technology's an older model. Frankly, if I were doing a restoration of any RV, I would brand certain to close the repair only after I take replaced any fiberglass batting used for insulation. Instead I would replace that batting with foam panels which is much easier to work with and less likely to have a mold buildup if it's exposed to a piddling moisture.
This is a good time to inspect whatever electrical outlets or switches for loose wiring or shorts too. This as well volition give you an opportunity to install additional outlets for 12-volt wiring such as USB charging lines for cellphones or laptop computers every bit well as whatsoever other wiring you lot may want to update.
Replacing your panels
There are literally hundreds of options when choosing to replace your RV panels. For me, I find the looks of forest grain very highly-seasoned and while I prefer a more natural look than this red oak stained panel shown here and available from Amazon, this 4'x8' panel does come unfinished making it a adept selection for someone like me that would adopt to stain information technology a lighter shade.
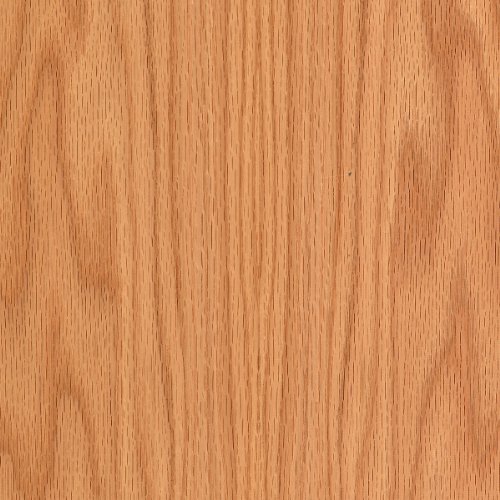
Wood-All Red Oak Wood Veneer Sheet, Flat Cutting/Evidently...
- REAL Woods VENEER SHEET – Unfinished and ready for stain and/or finish. Veneer provides stability...
- PREMIUM QUALITY – Gives you lot conviction that the wood will be right for your project
- Like shooting fish in a barrel TO Utilize – These veneer sheets are like shooting fish in a barrel to cut to the size you need and are easy to finish +...
Last update on 2022-02-xv / Affiliate links / Images from Amazon Product Advertisement API
While some folks may decide to cut corners and utilise a panel like this straight onto the studwork, I would recommend showtime attaching an underlayment of 1/8" plywood. Adding an additional layer of wood console volition in turn add forcefulness, more soundproofing, and most importantly, some other bulwark for natural elements such as heat in the summer and cold in the wintertime.
Every bit I said earlier, the options are practically countless when deciding on your wall's design. For instance, some people prefer a forest panel they tin pigment or apply wallpaper to. Other people prefer to apply a wood panel so add pare-and-stick panels over that, while some people adopt to use natural language and groove panels. Practice your research and find what works best for you.
One tool I would recommend when replacing paneling on you RV is an electrical or an air smash gun. These save a lot of time and since finish nails are small and hard to hold by manus, they are far more efficient when nailing your panels in identify. Additionally, you are less probable to impairment your paneling using a blast gun as opposed to a hammer.
Sale
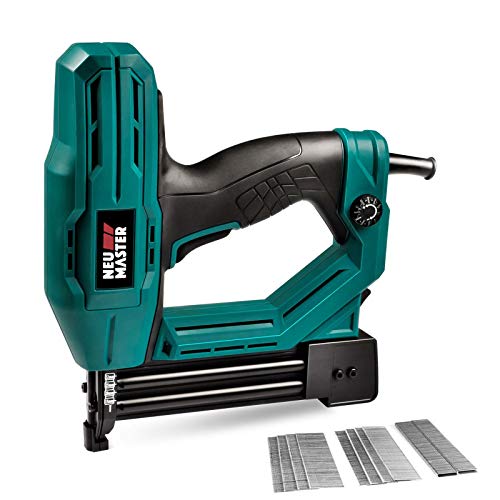
Electric Brad Nailer, NEU Primary NTC0040 Electric...
- 🔰CONVENIENCE --The wire 2-in-1 brad gun/staple gun doesn't need compressors, hoses for...
- 🔰WIDE APPLICATION -- The upholstery nail gun ideal for softwood DIY projects such as Carpentry...
- 🔰FLAWLESS FINISH -- Non-Marring rubber olfactory organ provides a complete finish.
Last update on 2022-02-xv / Chapter links / Images from Amazon Product Advertising API
Pro tip: Always dry fit your panels in place before y'all begin attaching them to your studwork. This ensures that your measurements were correct any cutouts for openings are correct.
Terminal thoughts
As with whatever DIY project when working on your RV, the more yous do them, the ameliorate your work is over time. Be patient equally you work and if you lot don't empathize something, exercise some additional research or seek out the advice of others that are more knowledgeable than you. Remember, most do-information technology-yourself RVers are a friendly bunch and unremarkably glad to pass forth whatever advice to those with less experience. If yous're doing some wall paneling in a van, brand sure to read Lindsey'due south article on van wall paneling during her van conversion procedure.
I have spent years learning how to restore, remodel, and maintenance RVs. That cognition didn't come to me overnight and while the internet is a valuable source for newbie RVers, not everything you lot may need to know is as easy as a click or two away on your laptop.
Thanks once more for following forth my friends. Stay safe, stay healthy, and I hope to come across you out on the route anytime.

Source: https://whereyoumakeit.com/rv/wall-repair/
Posted by: moralesclacers.blogspot.com
0 Response to "How To Repair Camper Walls"
Post a Comment